
OpenPGP is a widely use open standard for encryption and signing. Standardized by the Internet Engineering Task Force in 2007 per RFC 4880, it has become canonical for digital integrity, authenticity, and encryption across the world.
Overview
OpenPGP is centralized on data integrity; reliable and decentralized methods of authenticity for data and files, providing utilities including encryption, digital authentication, compression, and Radix-64 conversion. Furthermore, by utilizing OpenPGP, these technologies can be applied to perform more tasks—in varying complexity—like certificate and key management.
Workflow
As aforementioned, OpenPGP has powerful data integrity and protection capabilities. Most of us use it in our day-to-day lives unknowingly. Though the question still stands—how does OpenPGP really work?
OpenPGP employs public and private keys when executing data encryption functions. This might be a bit confusing, especially if you’re unfamiliar with cryptography, so let’s dive deeper into what this means.
Asymmetric Encryption
OpenPGP maintains the confidentiality and security of information with asymmetric encryption. Asymmetric encryption involves a public key, and a private key, comprising a mathematically-related keypair. Public keys can be freely shared with anyone, while your private key must remain secret at all times. Although encryption involves complex mathematical computations at the core, below is a demonstration of its practicality.
- To encrypt a private message to someone else—so that only they can read it—you’ll need to first obtain their public key.
- OpenPGP encrypts the message using their public key.
- You can send them the encrypted message over plaintext (in an unencrypted state).
- The recipient can use their private key to decrypt the message you sent them.
Digital Signatures
OpenPGP’s capability extends past encryption. Using your private key, you can digitally sign information and data, publicly proving its authenticity and producing a digital signature. You can verify the signed data using the author’s public key.
Get Started
At this point, you’re probably asking “this all seems really intriguing and interesting, so how do I get started?” Thankfully, many amazing developers around the world have drastically simplified this process. Download the latest version of the GNU Privacy Guard (“GnuPG”), an open-source OpenPGP implementation, on your device.
Generate a PGP Key
Execute gpg --full-generate-key --expert in your terminal to interactively generate your first PGP keypair. Choose the options presented below when prompted to.
- Please select what kind of key you want:
9
ECC and ECC - Please select which elliptic curve you want.
3
NIST P-256 - Please specify for how long the key should be valid.
I highly unadvise choosing no expiration (0). I recommend 2 years (2y) at the max. - Real name:
Enter your name. It doesn’t need to be your legal name. - Email address:
Input your email address. - Comment:
Comments are optional, but you may include a descriptive note that’s relevant to the key. - Passphrase:
Enter a passphrase in here. You’ll need it whenever you sign, decrypt, or encrypt data. Remember to write it down or store it somewhere secure.
Like that, you’re done, with your very own cryptographically and mathematically unique PGP key.
Exporting your PGP Key
Sometimes, you might need to export your PGP public key—perhaps to share with a friend, colleague, or to prove your identity or the authenticity of a statement. Exporting your PGP key is quite simple.
- List your PGP keys by running
gpg --list-keys.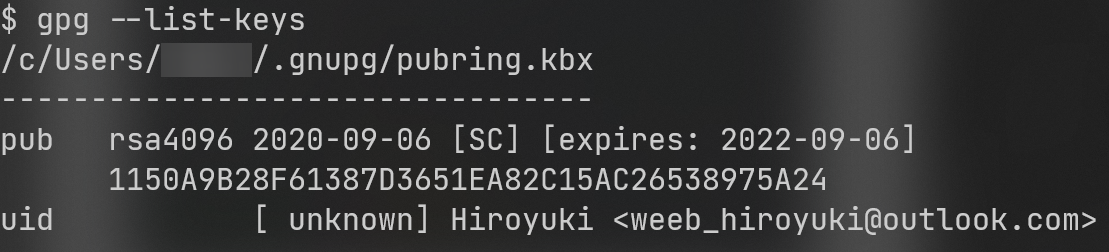
- Copy the key ID. e.g.,
1150A9B28F61387D3651EA82C15AC26538975A24 - Run
gpg --export 1150A9B28F61387D3651EA82C15AC26538975A24 --armor, replacing the supplied key fingerprint with your own. - Hooray! Your PGP key was exported in PEM encoding.
If you wish to supply an output, you may append --output to your export command supplying either a relative or absolute path as the argument. e.g., gpg --export 1150A9B28F61387D3651EA82C15AC26538975A24 --armor --output /home/hiroyuki/weeb_hiroyuki@outlook.com.pgp
If you wish to export your PGP key in binary format, you may omit the --armor flag.
Digital Signatures
Digital signatures is a core concept in the OpenPGP standard. Let’s sign the message “hello world” using GnuPG.
- Write the content “hello world” to a file.
- Execute
gpg --sign --armor /path/to/file. e.g.,gpg --sign --armor /home/hiroyuki/hello_world.txt - Your signed (publicly sharable and verifiable) digital signature can be found at
/path/to/file.asc. e.g.,/home/hiroyuki/hello_world.txt.asc
Importing a Public Key
In order to encrypt information to others, you must first import their public key. Ask them to export their public key and upload it to a public key server.
You can retrieve their public key manually, by copy and pasting the full key from the key server.
- Download their public key from the key server.
- Write their public key to a file.
- Execute
gpg --import /path/to/file. e.g,gpg --import /home/hiroyuki/exported-key.pgp
Alternatively, you may retrieve their key by searching for it on the key server. This may be more convenient if you have the key server and the key’s fingerprint.
Execute gpg --keyserver --recv, supplying the key server (without the protocol) and the fingerprint enclosed in quotation marks, respectively. e.g. gpg --keyserver keyserver.ubuntu.com --recv "5FA5 B0DD 5DA3 E650 73BE E5C1 D499 B75C 1390 E321"
Encryption
Now that you have the public key of your friend, you can now encrypt and securely deliver a message to them. How fascinating!
- Write the unencrypted text to a file.
- Run
gpg --encrypt --sign --armor --recipient matthew@staff.libraryofcode.org /home/hiroyuki/encrypted_message.txt, replacing the email address and the path to your unencrypted file with the appropriate values. - You may optionally add more recipients by repeating the
--recipientflag, or-rfor short. - Your encrypted message will now be available at
/path/to/file.asc. e.g.,/home/hiroyuki/encrypted_message.txt.asc
The recipient(s) can decrypt the file by executing gpg /path/to/file.asc.
Uploading your PGP Key
Often, you may want to upload your PGP key to a public key server, so that others can easily encrypt messages to you. GnuPG makes this task a walk in the park.
You may manually upload the key by copy and pasting the exported key to the key server (provided there’s a user interface accessible over HTTP), or you may utilize your GnuPG’s neat upload feature, by running pgp --send-keys --keyserver pgp.mit.edu 1150A9B28F61387D3651EA82C15AC26538975A24, replacing the --keyserver flag’s value with your key server, and your key ID.
To simplify this process even more and increase local accessibility, our engineers have developed and configured a custom key management solution. You can upload your PGP key in our Discord server. We’ve provided detailed instructions below to assist you.
- Export your PGP key, encoded in PEM, to a file.
- Run the
?pgp uploadcommand, attaching the file. - That’s it! You’re done! Your PGP key is now available and accessible by everyone.